How to Clean Windows Like a Professional Cleaner
Window cleaning is a task that many homeowners approach with a sense of reluctance, often because the results never seem to match the effort invested. Streaks, smudges, and residue are common frustrations, yet professional cleaners consistently achieve clear, sparkling glass with minimal drama. The difference lies not in special products or costly equipment, but in a systematic approach and an understanding of how cleaning agents interact with glass surfaces.
This article outlines the methods and principles used in professional window cleaning, focusing on the tools, timing, and techniques that contribute to a finish that is both functional and visually appealing. The goal is to provide a clear framework that can be applied in residential settings, without making claims about guaranteed outcomes. Each factor—from the choice of squeegee to the time of day—plays a role in the overall process, and attention to these details can help reduce the likelihood of streaks.
The following sections cover the essential tools, the role of cleaning solutions, the optimal window for timing, step-by-step squeegee usage, the complementary use of microfiber cloths, and approaches to common obstacles like hard water spots or stubborn dirt.
Essential Tools and Materials
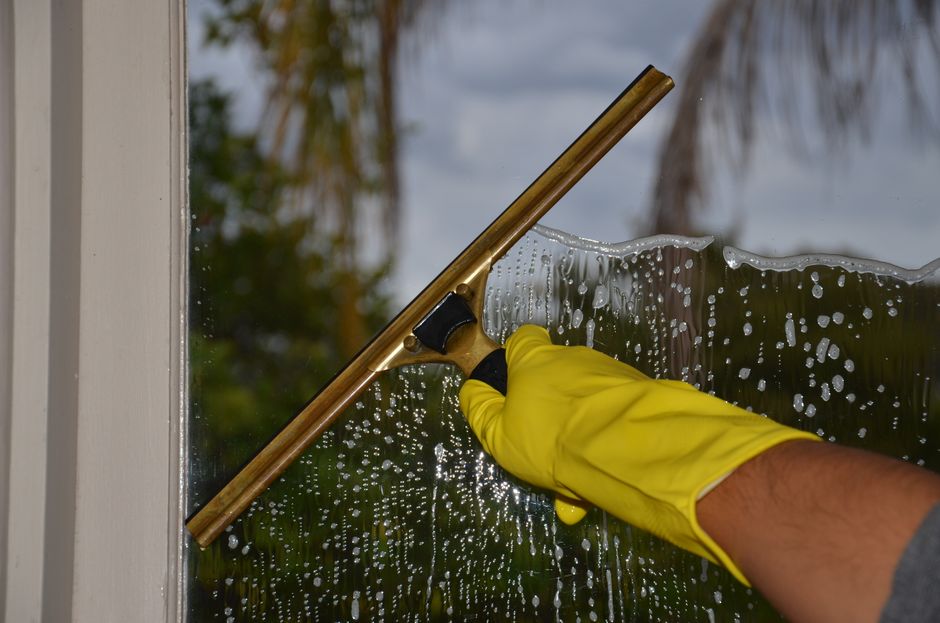
Professional window cleaning relies on a limited set of tools that are chosen for their specific functions. A squeegee is the primary instrument, typically featuring a rubber blade channel attached to a handle. The blade should be of high quality and replaced regularly, as a dull or nicked blade can leave streaks. Many professionals carry multiple squeegee sizes to accommodate different window dimensions, but a 14-inch or 18-inch model covers most standard residential windows.
Microfiber cloths serve multiple purposes in the process. They are used for detailing edges, wiping down sills, and drying the blade between passes. Unlike cotton cloths, microfiber does not shed fibers and absorbs moisture effectively without leaving lint behind. A supply of clean, dry microfiber cloths is a practical necessity.
A bucket, preferably with a wide mouth, holds the cleaning solution. Professional cleaners often use a smaller bucket to reduce water weight and minimize splashing. A scrubber or applicator pad with a soft, absorbent cover is used to apply the solution evenly to the glass. Finally, a sturdy ladder is necessary for reaching upper windows, but safety considerations—such as stable footing and appropriate ladder height—are paramount. No tool replaces careful planning and physical caution.
Choosing the Right Cleaning Solution
The cleaning solution is a frequently overlooked variable. Many commercial glass cleaners contain ammonia or alcohol, which can leave residues if not wiped completely. Professional window cleaners often prepare a soap-based mixture, typically a few drops of a mild dish detergent in a bucket of water. The purpose of the detergent is to break surface tension, allowing the squeegee to glide smoothly and lift dirt without creating foam.
Water quality also matters. Hard water contains minerals that can leave deposits on glass after drying. In areas with hard water, using distilled or filtered water reduces the likelihood of spotting. Some professionals add a small amount of vinegar or a commercial rinsing agent to the water to help it sheet off the glass more easily, though the effectiveness of such additives depends on the specific conditions.
The key is to avoid over-concentrating the solution. A solution that is too soapy can cause streaks as the residue remains on the glass. A balanced mixture supports the mechanical action of the squeegee and cloth, rather than relying on chemical power. Understanding the role of the cleaning solution as a facilitator—not a fix-all—helps set realistic expectations for the cleaning process.
Best Time of Day for Window Cleaning
Timing can influence the outcome of a window cleaning session more than many people realize. Direct sunlight causes cleaning solutions to evaporate quickly, which leaves behind minerals and soap residue before the squeegee can remove them. Even with a fast technique, hot glass and rapid drying create conditions that favor streaking.
Professional cleaners typically choose early morning or late afternoon, or work on overcast days, when the glass is cool and the sun is not shining directly onto it. Shady sides of the house are easier to work with, and scheduling the task around the sun’s path allows windows to be cleaned in stages. This approach does not guarantee a streak-free result, but it reduces one factor that can lead to uneven drying.
Temperature also plays a role. Cold glass can cause water to bead up rather than spread evenly, making it harder to achieve a smooth finish. A moderate temperature, between 50°F and 80°F, is generally considered favorable. Checking the weather forecast and planning accordingly is a simple step that supports consistent results.
The Squeegee Technique Step by Step
Using a squeegee effectively involves more than pulling a blade across glass. The process begins with wetting the entire window surface using the scrubber and cleaning solution. The scrubber should be saturated but not dripping, and it is moved in an S-shape or overlapping pattern to cover the glass thoroughly. This loosens any dirt or airborne particles that may have settled.
Next, the squeegee blade is prepared. Many professionals run the blade along a clean, damp microfiber cloth to remove any dust or debris that might scratch the glass. The first stroke is a horizontal pass along the top edge of the window, which creates a starting point. This is done by placing the squeegee at one corner, pulling it across the top, and then stopping slightly before the opposite edge.
Subsequent strokes are vertical, starting at the top of the window and pulling downward. The blade is tilted at a slight angle—typically about 20 to 30 degrees—so that the water is directed toward the already-cleaned area. Each vertical stroke should overlap the previous one by an inch or two to prevent a line of leftover water. After each stroke, the blade is wiped with a dry microfiber cloth to remove excess moisture. The final touch is to clean the lower edge and corners using the cloth.
The goal of the technique is to remove the cleaning solution completely from the glass, leaving no water behind. When executed consistently, the squeegee can produce a surface that appears dry almost immediately. However, variables such as blade condition, angle, and speed all affect the outcome, so practice and adjustment are part of the learning process.
Using Microfiber Cloths for Detail and Drying
Microfiber cloths play a supporting but essential role. After the squeegee passes, there may be small beads of water at the edges or corners, especially around frames and seals. A dry microfiber cloth can be used to wick away these isolated drops without redistributing them across the glass. The cloth should be folded into quarters to provide multiple clean surfaces as it absorbs moisture.
Windows with dividers, mullions, or grids present additional challenges. The squeegee cannot reach into these small compartments, so each pane must be cleaned individually. A microfiber cloth can be wrapped around a finger or a small detailing tool to access tight spaces. Some professionals prefer a combination of a smaller squeegee and a cloth for these areas, depending on the layout.
After the glass is done, microfiber cloths are also useful for wiping down window sills, tracks, and frames. Dust and debris in these areas can later be transferred back onto clean glass if not addressed. A final pass with a clean, slightly damp cloth can remove any remaining residue. The cloths themselves should be laundered regularly to maintain their absorbency and avoid reintroducing dirt.
Handling Common Challenges
Even with careful technique, certain windows present obstacles. Hard water spots are mineral deposits that bond to glass over time. They often require a separate cleaning step, such as using a mild acidic solution (e.g., diluted vinegar or a commercial product labeled for mineral removal) before the standard washing process. The effectiveness of these treatments varies with the severity of the deposits and the type of glass.
Windows that are painted shut, have sticky residues from stickers or tape, or are covered in construction dust may benefit from a pre-cleaning step. Using a plastic scraper to lift dried materials, followed by a thorough washing, can help avoid scratching the glass. Care must be taken to avoid scraping directly on the glass without lubrication.
Condensation between panes suggests a failing seal, which cannot be resolved by cleaning the exterior surfaces. In such cases, addressing the underlying issue—such as replacing the window unit—may be necessary. Professional cleaning methods focus on surfaces that can be accessed and treated, and they do not claim to repair structural problems. Recognizing the limits of cleaning helps manage expectations and directs attention to what can be controlled, such as technique and timing.